Sunday, September 16, 2012

Back to Blogging..... and the best roll cake ever!

After a two year hiatus, I am finally back to blogging!  Whoot!  The past two years have been a roller coaster but life has seemed to sail into calmer waters and I'm feeling gooo-od!

I'm also feeling extremely cheerful because I have finally found THE roll cake recipe!  After several attempts in this elusive search.....  I'm am finally satisfied. 

The texture is fine and soft, and the crumb small and tender.  There is no eggy smell nor taste, which is sometimes quite apparent in cakes, and does not find favor with me.  So if your cake preference involves a heavy egg flavor, then this will not suit you.

Without further ado - here is the recipe adapted from Evan's Kitchen Ramblings:

Original recipe source : 模様入りロールケーキ デコ★ロールもっと作っちゃお! キャラ&動物編 by junko


Ingredients (makes one 10"/25cm roll) :
for the cake :
3 egg whites
1 egg yolk 
65g caster sugar
60ml water
40ml neutral vegetable oil
drop of vanilla extract
80g cake flour (for the cake)
2 tsps cornstarch

Filling :
150ml whipping cream
14g sugar
two types of fruits of your choice, sliced (you could try canned cling peaches and canned pears)

Directions :
1. Preheat oven to 170C.  
2. Make the yolk batter, lightly whisk 1 egg yolk in a bowl. 
3. Add in 1/2 of the sugar (30g) and 1/2 the veg oil (20ml) and whisk until combined. 
4. Add in the water, the rest of the oil & vanilla extract and whisk until combined. 
5. Sift over the 80g cake flour and fold until lumps disappear.
6. Whisk the remaining 3 egg whites, rest of the sugar (35g) and 1 tsp cornstarch until stiff peaks.
7. Fold into the remaining yolk batter and pour batter directly onto the tray.
8. Level with spatula and bake in a preheated oven of 170C for 14 mins until golden.
9. Remove baking paper gently, roll Cake and leave to cool.
5. To make the filling, whisk whipping cream and sugar until soft peaks. using a spatula, spread filling evenly on cake and line the filling onto the cake. roll up cake with the parchment paper and refrigerate to set. 

I can't wait to experiment with the different variations; Pandan, Chocolate, Lemon....mmmm...... which is your favorite roll cake flavor?  Stay tuned!   

Saturday, August 29, 2009

Marble Cake

Green Tea Ice Cream

In my previous post I mentioned that I was on ice cream making spree.  I have discovered the excellent quality of home made ice cream and how different it is from the general store-bought variety.    One of the trials was to make David Lebovitz's Green Tea Ice Cream.  I had purchased some good quality matcha from the famous Ippodo in Kyoto last year and decided to make use of it.  Good quality matcha contributes to the lovely green colour of this ice cream.  Using an inferior quality green tea power results in an ice cream which will not look as attractive.  
For those green tea afficados, here's the recipe.  You won't regret it.

Green Tea Ice Cream (Makes about 1L)
  • 1 Cup (250ml) Whole Milk
  • 3/4 Cup (150g) Sugar
  • Pinch of Salt
  • 2 Cups (500ml) Heavy Cream
  • 4 teaspoons Matcha (green tea powder)
  • 6 Large Egg Yolks
Method
  • Warm milk, sugar and salt in a saucepan.
  • Pour cream into a large bowl & whisk together with macha powder. set a strainer on top.
  • In another bowl, whisk together egg yolks and slowly pour in the warmed milk mixture while whisking constantly, and put the mixture back to the saucepan.
  • Stir the mixture constantly over medium heat, scraping the bottom as you stir, until mixture thickens and coat the back of a spatula, or about 85degC.
  • Pour custard through the strainer into the cream, then whisk vigorously until custard is frothy to dissolve the macha powder. Stir until cool over an ice bath.
  • Chill the mixture thoroughly then churn in an ice cream maker according to manufacturer's instructions then freeze until firm.
Its really very yummy. You have to try it! 

Thursday, August 6, 2009

Ice Cream

Lately I have been on an ice cream making spree. My Cusinart ice cream maker is finally getting its much needed exercise. I have made Green Tea, Chocolate, Vanilla and Black Sesame ice cream so far. My education in ice cream and its consituents is finally moving along.

In my opinion, there are basically two ways of making ice cream. There is the Simple Way and the Not-So-Simple way. The Simple Way is by blitzing everything in a blender, and setting the whole mixture. The Not-So-Simple Way involves egg yolks and making a custard. Taste wise, the Not-So-Simple way produces a product which is far superior than the Simple Way. Its creamier, smoother and richer (and of course more calories). But if you eat in moderation, I highly recommend the Not-So-Simple way to make ice cream because one should not waste their (and their friends and family's) calories on the not-the-best food.

I'll take some photos of the ice creams I have made and post them up with recipes. If you have a ice cream making sitting dustily in the storage or at the far back of the cupboard. It may be time to take them out, wipe off the dust lovingly and set it to work. If you follow those recipes that I post up and make your own ice cream, you'll enjoy an ice cream tastewise far better than those you'll buy in the supermarkets. And these freshly made bundles of ice cream will be free of preservatives and full of love. Watch out for the coming post!

Saturday, July 25, 2009

French Apple Tarte


Hullo folks, for those that have been following my food blog, i know i haven't been regular in posting, and its been some time since my last blog entry.  Life's been busy.  I went on a really lovely two week vacation to Europe and had my first encounter with the French Apple Tarte in a cafe in Paris.  I was entralled by the taste.  It was sweet, tangy and rich.  The emsemble had thinly sliced apples sitting on a crisp buttery thin crust.  Upon return, I was determined to re-create it at home.  I can't possibly fly to paris just to satisfy a craving, can I.  Mastering the art of french apple tarte is certainly the cheaper option.

I obtained a recipe from Food Network.  Ina Garten's recipe looked promising and I decided to use the apple fomula from that.  For the base, I used the recipe from David Lebovitz.  That is my go-to recipe for pie crust, sweet or savory.

Without further ado, here's the recipe. 

Ingredients for the apples topping:

  • 4 Granny Smith (green) apples
  • 1/2 cup castor sugar
  • 4 tablespoons cold unsalted butter, diced into small cubes
  • 1/2 cup apricot jam/gel
  • 1 tablespoons rum
  • 1 tablespoon water

Method

  1. Peel the apples and remove the cores from them. 
  2. Slice the apples crosswise in thin slices. 
  3. Place overlapping slices of apples diagonally down the middle of the tart and continue making diagonal rows on both sides of the first row until the pastry is covered with apple slices. 
  4. Sprinkle with the full 1/2 cup of sugar and dot with the butter.
  5. Bake for 45 minutes to 1 hour, until the pastry is browned and the edges of the apples start to brown. 
  6. Rotate the pan once during cooking. 
The apple juices will burn in the pan but the tart will be fine.  When the tart's done, heat the apricot jelly together with the rum/water and brush the apples and the pastry completely with the jelly mixture. 

Loosen the tart with a metal spatula so it doesn't stick to the paper. 

Allow to cool and serve warm or at room temperature.

Enjoy!

Sunday, April 5, 2009

Chocolate Caramel Cheesecake

Cheese cake... baked, no-bake, i love them all. Cheese is in fact one of my favourite foods. i enjoy the savoury soothing creamy taste. In cake, out of cake, on its own, on pasta etc. The list really can go on.

Cheesecakes are finicky, they are relatively easy to make...with some precautions. I've listed those below what those are so you will not make the mistakes like i did....twice.


Dos and Don't of Cheesecake Baking


1. Make sure that ingredients are room temperature before baking. Bring them out of the fridge at least 10mins before baking.
2. Bake the cheesecake in a springform tin, it makes un-moulding the cheesecake easy. Remember to lightly oil the sides with to prevent the cheesecake from sticking to the side and causing the cheesecake to crack during cooling.
3. Ensure that your oven is pre-heated to the correct temperature. Place the cheesecake in the middle of the oven in a water bath filled with boiling water.
4. When mixing the ingredients, DO NOT OVERBEAT! This was a mistake that I first made when I started baking cheesecakes. Overbeating will cause too much air incorporated into the cheesecake and will cause it to crack. This is not a butter cake or sponge cake where you would beat the crap out of the butter and sugar to get as much air into the batter so the cake will be light and fluffy. Cheesecakes work in the opposite way. Beat the cheese with a paddle beater just to soften it up and add in the eggs, one at a time, beating it gently in at LOW speed. Eggs can also be folded in with a spatula/wooden spoon.
5. Do not open the oven door when baking. This creates a flow of cool air into the oven and cause the top of the cheesecake to crack a wide smile. Not something that looks pretty unless its an oreo cheesecake and you intend to over the top with crushed oreo bits. Then I guess it really doesn't matter.
6. Once the cheese cake has completed the baking time, it normally takes about 60mins to bake, remove cheesecake from water bath gently. Avoid too much shaking. Run a metal spatula or small knife round the side to prevent sticking to the cake tin wall. Do not un-lock the springform pan right away. Leave cheesecake to cool in the room till before placing it in the fridge.
7. Some recipes indicate cheesecake to chill for at least 4hours before serving. My suggestion is to chill overnight. 4 hours is waaaay to short for the flavours to fully blend and meld together. For best results....chill overnight.... i cannot stress this enough. Trust me. This is also another mistake which impatient me has committed.
8. Finally, eating the cheesecake. To slice the cheesecake pretty-ly, use a metal knife sipped in hot water, and wiped with a paper towel between cuts. This will give you smooth cuts with clean slices of cake.


All set to try to make your cheesecake yet? Here's the recipe...


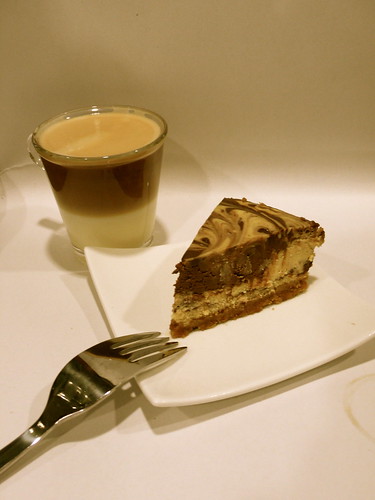
Chocolate Caramel Cheesecake (Adapted from Stefanie)


Ingredients for Base
170g Graham Crackers (or Digestive Biscuits / Marie Biscuits)
30g Light Brown Sugar
70g Melted Butter (either salted or unsalted)


Ingredients for Caramel Layer (Optional)
120ml Dulce de Leche*
Pecan nuts, chopped


Ingredients for Cheesecake Layer
170g Chocolate Ganache (Made from 200g of 55% Dark Chocolate, melted and 1 tin of Nestle Cream, 170g)
500g Cream Cheese, softened
150ml Sour Cream
150g Brown Sugar
1 Tsp Vanilla Extract
2 Eggs
1/4 Cup Plain Flour


Method
1. Place biscuits in a clean, food-safe, disposable plastic bag and pound till becomes crumbs. Combine crumbs with sugar and melted butter. Press unto bottom of a 9" springform pan. Place in freezer for 10mins to firm up the base.
2. Remove pan from freezer and pour caramel or Dulce de Leche mixture, sprinkle nuts and freeze for 30mins.
3. Preheat oven to 160degC.
4. Using a stand mixer, use the paddle blade and beat cream cheese, sugar, sour cream, vanilla until smooth. Beat at medium speed, do not oven beat. We don't want to incorporate too much air. Beat in the eggs one at a time (you can also use a spatula to fold the beaten eggs in one at a time). Sift in the Plain Flour and beat gently. Remove 1/3 of the batter and mix with chocolate ganache till smooth. Take the springform pan out of the freezer and pour some of the non-chocolate batter on the base. Marble 1/2 the chocolate cheesecake batter into the mixture. Pour remaining non-chocolate batter into the pan, add the rest of the chocolate cheesecake batter and marble the mixture using a knife.
5. Wrap the pan in double layer of heavy duty aluminium foil and place it into a larger pan (already in oven), and pour boiling water into the larger pan, surrounding the springform pan with cheesecake in it. Bake for 55-60mins. The center of the cheesecake may not look like its cooked, and may appear wobbly. This is normal. Do not wait for the center to look firm, you cheesecake would be waaaay overcooked by then.
6. Very important step, remove cheesecake from water bath, place on counter, cool before placing in fridge. Refrigerate overnight. This is a must for the flavour and cheese to property meld and blend. It makes a very big difference. Trust me.


Okay....now you have the recipe, go try it and let me know how yours turns out.


*Dulce de Leche Recipe - Adapted from David Lebovitz
Preheat the oven to 22odegC
Pour 1 Can of Sweetened Condensed Milk into a Pyrex baking dish. Stir in a dash of sea salt.
Set the baking dish into a larger one, like a bain marie. The water should reach halfway up the side of the smaller one.
Cover the smaller dish snugly with aluminium foil and bake for 60-90min. Check frequently during baking and add more water into the larger, outer dish as necessary.
Once Dulce de Leche is browned and caramelized, remove from oven and cool. Once cool, whisk till smooth using a hand whisk.
Store in the refrigerator until ready to use. If its too stiff, warm in a water bath.